Land of the Dead Lairs (WAR)
There are 4 lairs in the Land of the Dead. Each lair requires a different combination of Glyphs to be able to enter. These Glyphs can be unlocked by doing the Land of the Dead Public Quests. When your entire 6 man group has the right set of Glyphs activated, your party leader must zone into the Lair entrance to set the instance ID. After that, the rest of the group can zone in. Note that you can't zone in while in combat. There is also currently a bug where a mob called 'Lair Glyph Effect' will aggro you at the door. If this happens, you can kill it using AoE effects, and zone in as soon as it dies before another respawns to take it's place. Lairs do not have lockout timers. Instead, once the boss is beaten, the glyphs for that lair will darken. In order to do the instance again, you must re-obtain the correct glyphs by re-doing the associated PQs.
| Contents [hide] |
Tomb of the Stars
- Location: 59k, 24k
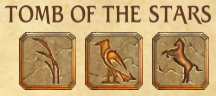
- Glyphs Required: Reed, Vulture, Horse
- Basics: Run down the pathway and try to stay ahead of the terrible Death Swarm!
- Boss: Tsekani Heyafa
- Boss Tactics: The small swarm mobs do damage and heal the boss. When they pop, kill them and use damage shields on your group to prevent healing. The swarm debuff will stack up to 5, and can be cleansed off to prevent the swarm mobs from popping. There is unavoidable damage throughout the fight on random members of the group (Armor or Toughness or both will lower this damage). At around 50%, the boss will summon the Death Swarm into the room. This swarm focuses on random members and drifts towards them. Anyone that the Swarm touches will be instantly killed. Players cannot be resurrected during this fight. The Swarm does not despawn after the death of the boss, so loot quickly!
Tomb of the Sky
Tomb of the Moon
Tomb of the Sun
|
